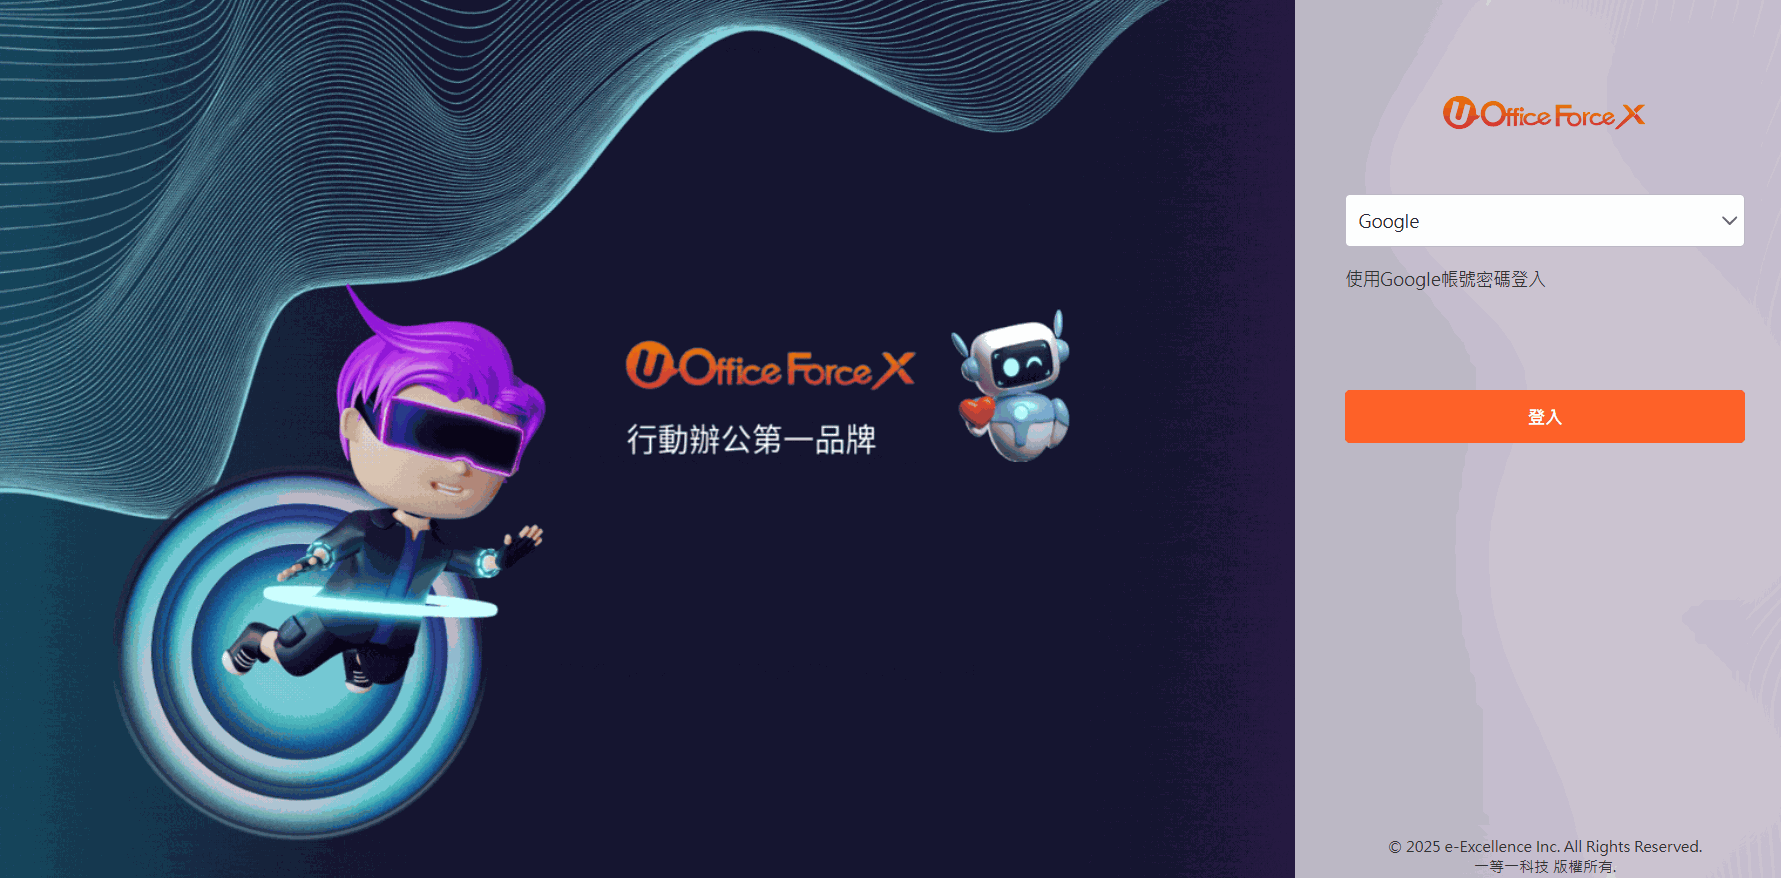
使用 Google 帳號登入 UOFX
「自訂驗證」將登入的權柄交給足夠信任的外部系統,藉由兩個系統之間的串接,完成登入的需求。 以下會展示一個應用情境:「使用 Google 帳號登入 UOFX」,並提供具體的實作步驟與方法作為參考。
應用情境
企業內部使用 Google Workspace 作為主要帳號系統,包含 Gmail、Google Drive 等,為簡化帳號管理與提升使用者體驗,期望讓使用者能夠直接使用 Google 帳號登入 UOFX 系統,而無需額外建立與維護 UOFX 帳號。
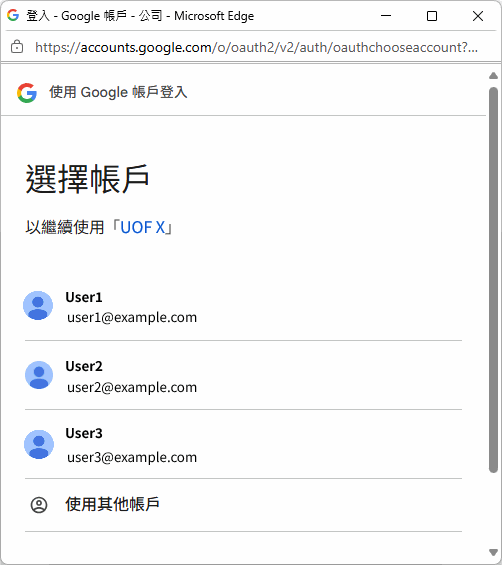
透過 UOFX 的「自訂驗證」機制,企業可將登入驗證流程委由 Google OAuth 2.0 處理,當使用者進入 UOFX 登入頁時,選擇「Google」選項,系統將導向 Google 的授權頁面。完成授權後,Google 會回傳授權碼供取得使用者資訊,UOFX 根據使用者資訊的 Email 進行用戶身分比對與登入。
此機制使帳號管理集中化,減少重複新增帳號、遺忘密碼等問題,達到統一認證的整合目標。
使用 Google 帳號登入 UOFX 流程圖
sequenceDiagram
    participant A as UOFX 登入頁
    participant B as Google 授權頁面
    participant C as 已授權的重新導向 URI
    participant D as Callback URL

    Note over A: 點擊登入
    A ->> B: 導向 Google 授權頁<br>(傳遞 Info 參數)
    Note over B: 登入 Google 帳號
    B ->> C: 導向已授權的重新導向 URI
    Note over C: 產生 Token
    C ->> A: 將 Token、Info 等結果回傳
    A ->> D: 呼叫 Callback URL 並傳送 Token
    Note over D: 驗證 Token
    Note over D: 將 Google 帳號加密
    D ->> A: 回傳加密 Google 帳號
    Note over A: 解密 & 比對
    Note over A: 🎉成功登入 UOFX
UOFX 與 Google 帳號整合優勢
- 單一登入體驗:使用者可直接使用 Google 帳號登入 UOFX,無須記憶多組帳號密碼,提升便利性與安全性。
- 帳號集中管理:企業可透過 Google Workspace 統一管理所有使用者,簡化帳號建立與停用流程,降低維運成本。
啟動專案
在繼續往下說明之前,請確認您下列事項皆已經準備完成:
- 已取得 UOFX
站台網址 - 已取得
金鑰
範例程式碼:UOFX-SDK-Training
完成以下步驟後,即可啟動專案觀看成果,下方 實作 會對程式碼進行逐步說明:
- Google Console 新增 OAuth 2.0 應用程式
- 專案設定 appsettings.json
- UOFX 設定自訂登入
Google Console 新增 OAuth 2.0 應用程式
可參考 使用 OAuth 2.0 存取 Google API 了解如何建立與設定 Google OAuth 2.0 應用程式
- 新增專案
- 設定 OAuth 同意畫面
- API 與服務 → OAuth 同意畫面 → 開始
- 填寫應用程式名稱、支援電子郵件等資訊
- 目標對象:外部
- 填寫聯絡資訊
- 新增 OAuth 2.0 用戶端 ID
- API 與服務 → 憑證 → 建立憑證 → OAuth 用戶端 ID
- 應用程式類型:網頁應用程式
- 填寫名稱
- 新增已授權的重新導向 URI:
<您的 API 位址>/uofx/oauth-callback
專案設定 appsettings.json
將剛剛新增的 OAuth 2.0 應用程式資訊填入 GoogleAuthInfo 中,參數說明如下:
| 欄位 | 說明 |
|---|---|
ClientId |
OAuth 2.0 應用程式的 用戶端編號,用於辨識哪一個應用請求的授權 |
ClientSecret |
與 ClientId 搭配的 用戶端密碼,用於授權碼交換 access token 時的身份驗證 |
RedirectUri |
當使用者完成 Google 授權後,Google 會把授權碼傳送到此 URI。 必須與 OAuth 2.0 應用程式中設定的 已授權的重新導向 URI 完全一致 |
Scope |
定義你的應用需要授權哪些使用者資訊,例如:email:信箱profile:名稱、頭像等基本資訊openid:建立 OpenID Connect 登入機制 |
State |
用於防止 CSRF。完成 Google 授權後,會原樣帶回,可用來驗證來源是否一致 (於開啟 Google 授權頁時產生) |
Prompt |
控制 Google 授權頁的顯示,例如:none:不顯示登入畫面,若使用者未登入則會失敗consent:強制使用者重新同意授權select_account:強制顯示帳號選擇畫面select_account:強制要求重新登入 |
"GoogleAuthInfo": {
  "ClientId": "<用戶端編號>",
  "ClientSecret": "<用戶端密碼>",
  "RedirectUri": "<已授權的重新導向 URI>",
  "Scope": "email",
  "Prompt": "select_account"
}
UOFX 設定自訂登入
新增一個「自訂登入驗證」
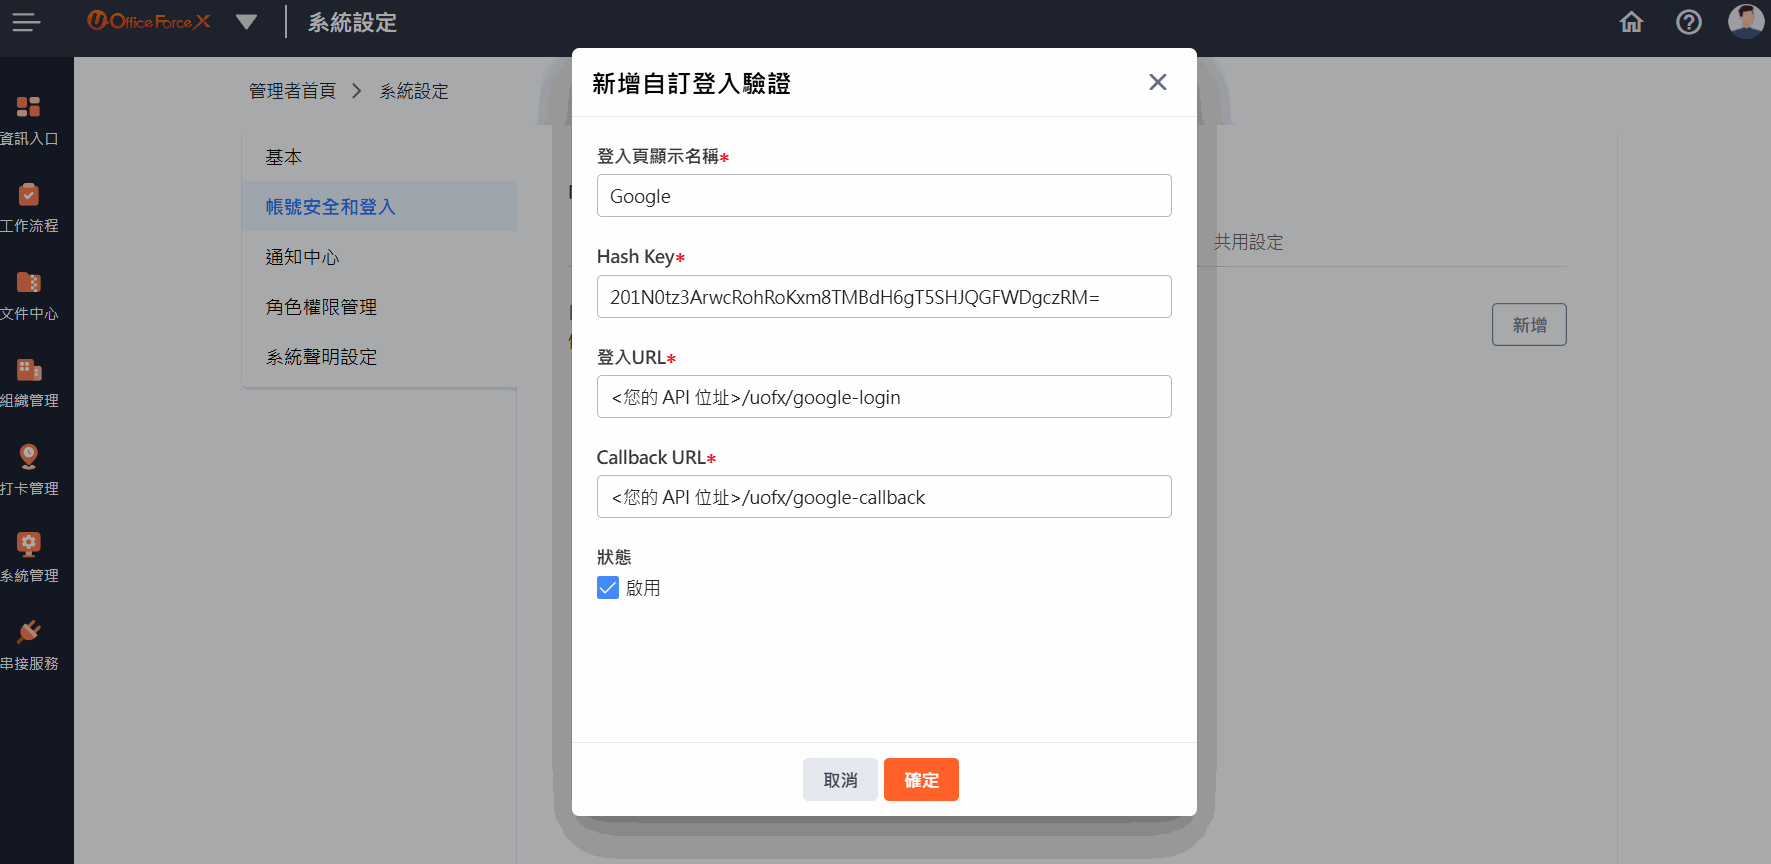
Note
- Hash Key 必須與
GoogleController中的_HashKey相同 - 登入URL 必須設定為
GoogleLogin()的網址 - Callback URL 必須設定為
Accountkey()的網址
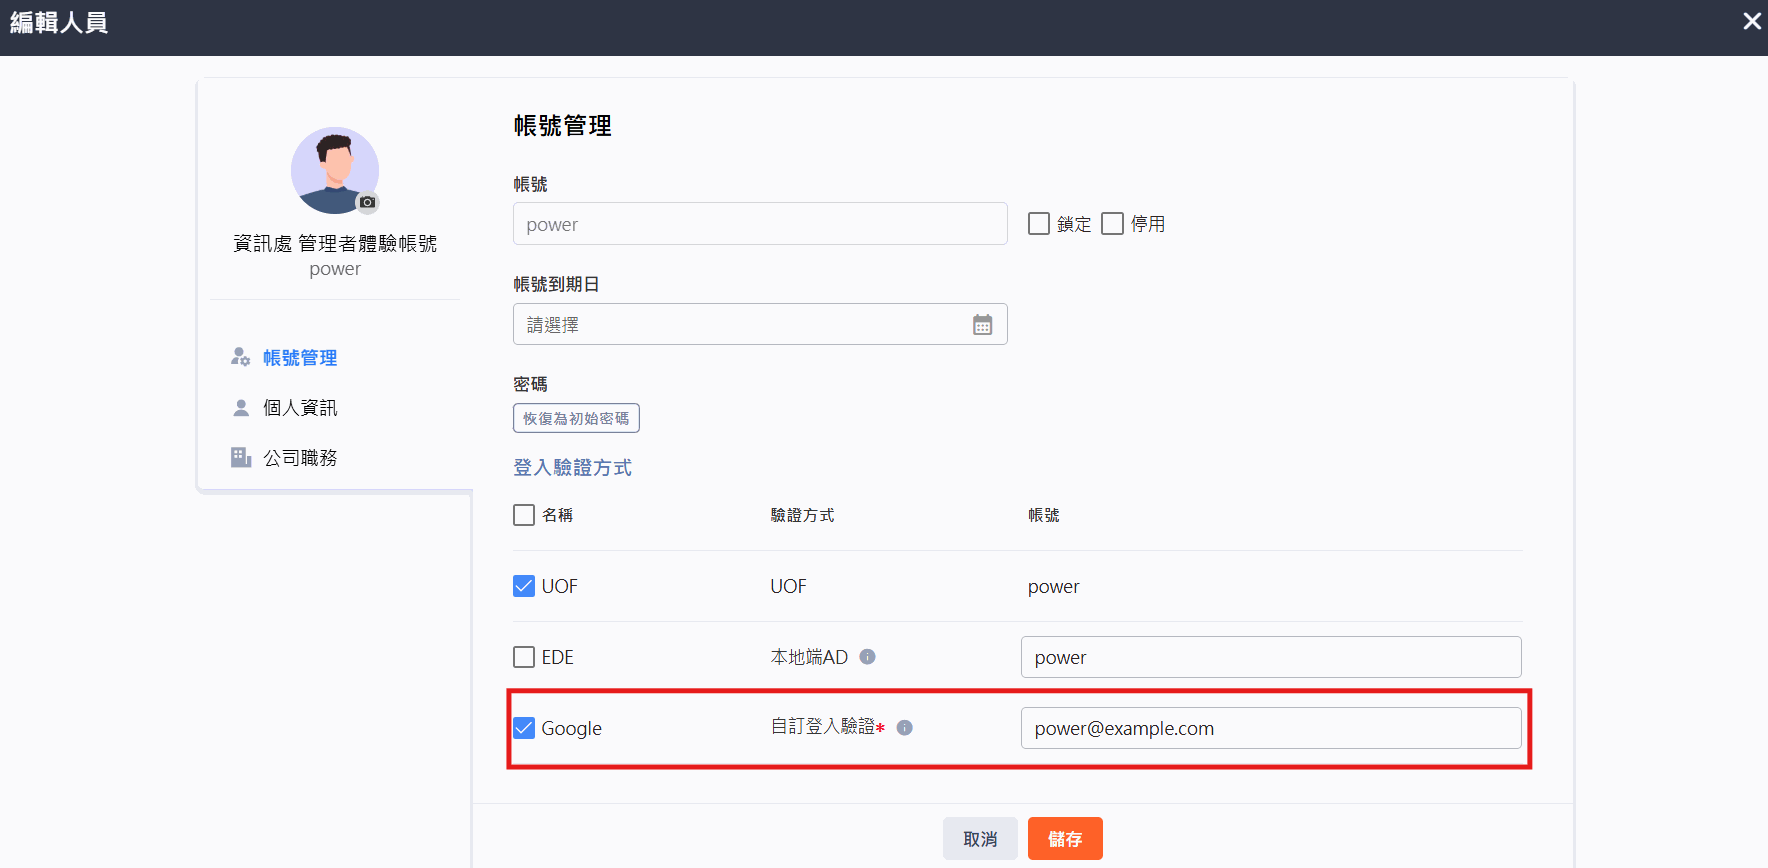
接著到「組織人員維護」,並進到欲顯示該人員表單資訊的「編輯人員」畫面,勾選「Google」自訂登入驗證並填入 Google 帳號
實作
以下為此情境的實作步驟:
- 設定點擊登入按鈕後導向 Google 授權頁面
- 設定授權成功後的回傳處理
- 設定 UOFX 呼叫的 Callback URL
- 成果展示
設定點擊登入按鈕後導向 Google 授權頁面
A. 設定 GoogleModel.cs
宣告 GoogleAuthInfo 類別,包含 Google OAuth 所需的各項參數
namespace Ede.Uofx.ThirdPartyAd.Sample.Models
{
    /// <summary>
    /// Google驗證資訊
    /// </summary>
    public class GoogleAuthInfo
    {
        /// <summary>
        /// Google OAuth 應用程式的 Client ID,通常在 Google Cloud Console 建立 OAuth 憑證時取得
        /// </summary>
        public string ClientId { get; set; } = string.Empty;

        /// <summary>
        /// 與 Client ID 搭配使用的密鑰,用於交換 access token 時驗證身份,請勿在前端或公開位置暴露
        /// </summary>
        public string ClientSecret { get; set; } = string.Empty;

        /// <summary>
        /// 使用者完成授權後,Google 將會導向至的 URL,需與 Google Cloud Console 中設定的 redirect URI 完全一致
        /// </summary>
        public string RedirectUri { get; set; } = string.Empty;

        /// <summary>
        /// 要請求使用者授權的權限範圍(scope),例如 email、profile 等,可用空格分隔多個 scope
        /// </summary>
        public string Scope { get; set; } = string.Empty;

        /// <summary>
        /// 自訂的狀態碼,可用於在授權流程中傳遞自定資訊,例如防止 CSRF 或附帶參數,通常會加密 infoModel
        /// </summary>
        public string State { get; set; } = string.Empty;

        /// <summary>
        /// 控制 Google 授權頁的顯示,例如 none、consent、select_account、login 等
        /// </summary>
        public string Prompt { get; set; } = string.Empty;
    }
}
B. 設定 GetGoogleAuthUrl()
在 GoogleController 中新增 GetGoogleAuthUrl() 方法,根據 GoogleAuthInfo 參數產生 Google 授權頁面的 URL
/// <summary>
/// 取得 Google 授權頁面 URL
/// </summary>
/// <returns></returns>
private string GetGoogleAuthUrl(string stateToken)
{
    var clientId = _googleAuthInfo.ClientId;
    var redirectUri = _googleAuthInfo.RedirectUri;
    var scope = _googleAuthInfo.Scope;
    var state = stateToken;
    var prompt = _googleAuthInfo.Prompt;

    var authUrl = $"https://accounts.google.com/o/oauth2/v2/auth?client_id={clientId}&redirect_uri={redirectUri}&response_type=code&scope={scope}&state={state}&prompt={prompt}";

    return authUrl;
}
C. 設定 GoogleLogin()
在 GoogleController 中新增 GoogleLogin() 方法,當使用者點擊登入按鈕時,導向 Google 授權頁面:
- 從網址中接收
info參數,並將其存入TempData,後續登入成功後回傳 - 產生 State 參數的 Sid,並產生 State Token
- 使用
GetGoogleAuthUrl()取得 Google 授權頁面 URL - 導向 Google 授權頁面
/// <summary>
/// 導向 Google 授權頁面
/// </summary>
[HttpGet("uofx/google-login")]
public IActionResult GoogleLogin()
{
    // 從網址中接收 info 參數
    if (!Request.Query.TryGetValue("info", out var info))
    {
        // 如果沒有 info 參數,返回錯誤
        ViewBag.ErrorMessage = "info is required";
    }

    // 保存 info model 到 TempData,後續登入成功後須回傳
    TempData["InfoModel"] = info.ToString();

    // 產生 State 參數的 Sid,並產生短時效 Token
    var stateSid = GetSid("state");
    var stateToken = TokenHelper.GenToken(stateSid, DateTimeOffset.Now.AddMinutes(5));

    // 取得 Google 授權頁面 URL
    var authUrl = GetGoogleAuthUrl(stateToken);
    // 導向 Google 授權頁面
    return Redirect(authUrl);
}
設定授權成功後的回傳處理
於 Google 授權頁面完成授權後,Google 會導向 RedirectUri,並附帶授權碼(Code) 與 State 參數
A. 驗證參數
- 確認 Code、 State 參數是否存在
- 驗證 State Token 是否有效
/// <summary>
/// 授權成功後的回傳處理
/// </summary>
/// <param name="code"></param>
/// <param name="state"></param>
/// <returns></returns>
[HttpGet("uofx/oauth-callback")]
public async Task<IActionResult> OAuthCallback(string code, string state)
{
    // 從網址中接收 code 參數 (Google 授權成功後會帶回這個 code)
    if (string.IsNullOrEmpty(code))
        throw new Exception("Code not found");

    // 從網址中接收 state 參數 (Google 授權成功後會帶回這個 state)
    if (string.IsNullOrEmpty(state))
        throw new Exception("State not found");

    // 驗證 state 參數,確保是從 Google 授權頁面回來的
    if (!TokenHelper.VirtyfyAndGetData(state, out var stateSid))
        throw new Exception("Invalid Token");

    ...
}
B. 使用 Google 帳號產生 Token
若要取得使用者資訊,必須先使用授權碼(code) 向 Google 取得 access_token:
- 向 Google 取得 access_token
- 使用 access_token 向 Google 取得使用者資訊
- 產生 Google 帳號的 Sid,並產生 UOFX Token
/// <summary>
/// 授權成功後的回傳處理
/// </summary>
/// <param name="code"></param>
/// <param name="state"></param>
/// <returns></returns>
[HttpGet("uofx/oauth-callback")]
public async Task<IActionResult> OAuthCallback(string code, string state)
{
    ...

    // 設定要傳遞給 Google 的資料,包含 code、client_id、client_secret、redirect_uri 和 grant_type
    var postData = new Dictionary<string, string>
    {
        { "code", code },
        { "client_id", _googleAuthInfo.ClientId },
        { "client_secret", _googleAuthInfo.ClientSecret },
        { "redirect_uri", _googleAuthInfo.RedirectUri },
        { "grant_type", "authorization_code" }
    };

    // 將 postData 轉換為 FormUrlEncodedContent(HTTP POST 請求的格式)
    var formContent = new FormUrlEncodedContent(postData);

    // 向 Google 取得 access_token,並將回應的 JSON 字串反序列化後,取得 access_token 欄位值
    var tokenResponse = await _http.PostAsync("https://oauth2.googleapis.com/token", formContent);
    var tokenJson = await tokenResponse.Content.ReadAsStringAsync();
    var tokenData = JsonSerializer.Deserialize<JsonElement>(tokenJson);
    var googleAccessToken = tokenData.GetProperty("access_token").GetString();

    // 使用 access_token 向 Google 取得使用者資訊,並取得 email 欄位值
    var userInfoResponse = await _http.GetAsync("https://www.googleapis.com/oauth2/v2/userinfo?access_token=" + googleAccessToken);
    var userJson = await userInfoResponse.Content.ReadAsStringAsync();
    var user = JsonSerializer.Deserialize<JsonElement>(userJson);
    var email = user.GetProperty("email").GetString();

    // 產生 Google 帳號的 Sid,並產生短時效 Token
    var sid = GetSid(email);
    var uofxAccessToken = TokenHelper.GenToken(sid, DateTimeOffset.Now.AddMinutes(5));

    ...
}
C. 將 Token 與 Info 回傳
- 從 TempData 取得 info model,並將其轉換為 InfoModel 物件
- 製作 PostMessage Model,包含 info、token、message 和狀態碼
- 將 PostMessage Model 序列化成 JSON 字串
- 將結果傳回給 UOFX 的前端頁面,LoginSuccess 程式可參考此:返回 UOFX
/// <summary>
/// 授權成功後的回傳處理
/// </summary>
/// <param name="code"></param>
/// <param name="state"></param>
/// <returns></returns>
[HttpGet("uofx/oauth-callback")]
public async Task<IActionResult> OAuthCallback(string code, string state)
{
    ...

    // 從 TempData 取得 info model,並將其轉換為 InfoModel 物件
    var modelJson = TempData["InfoModel"] as string;
    byte[] bytes = Convert.FromBase64String(modelJson);
    var infoString = Encoding.UTF8.GetString(bytes);
    var infoModel = JsonSerializer.Deserialize<InfoModel>(infoString, new JsonSerializerOptions
    {
        // 預期 JSON 屬性是小寫開頭的駝峰式命名,以及不區分大小寫,對 JSON 屬性名稱容錯處理比較寬鬆
        PropertyNamingPolicy = JsonNamingPolicy.CamelCase,
        PropertyNameCaseInsensitive = true
    });

    // 製作 PostMessage Model,包含 info、token、message 和狀態碼
    var postMessage = new PostMessageModel
    {
        Info = infoModel,
        Token = uofxAccessToken,
        Message = "TPAD login success via Google.",
        StatusCode = 200
    };

    // 將 postMessage 序列化成 JSON 字串
    var result = JsonSerializer.Serialize(postMessage, new JsonSerializerOptions
    {
        // 將屬性名稱第一個字母轉為小寫
        PropertyNamingPolicy = new LowercaseFirstLetterPolicy(),
        WriteIndented = true
    });

    // 將結果傳回給 UOFX 的前端頁面
    return View("LoginSuccess", result);
}
設定 UOFX 呼叫的 Callback URL
UOFX 接收到 Info 與 Token 等資訊後,會呼叫 Callback URL 並將 Token 回傳
A. 驗證 UOFX Token 是否有效
- 確認 UOFX Token 是否存在
- 驗證 UOFX Token 是否有效
/// <summary>
/// 驗證 token 並回傳 account key
/// </summary>
[HttpGet("uofx/google-callback")]
public IActionResult Accountkey()
{
    // 從網址中接收 token 參數 (UOFX 會以 query-string 't' 傳遞過來)
    if (!Request.Query.TryGetValue("t", out var accessToken))
        throw new Exception("Token not found");

    // 驗證 Token,並從 Token 中取得 sid
    if (!TokenHelper.VirtyfyAndGetData(accessToken, out var sid))
        throw new Exception("Invalid Token");

    ...
}
B. 取得 Google 帳號並加密回傳
- 根據 sid 取得帳號
- 產生要回傳的 model,並使用 AES 加密
- 將加密後的結果傳回
/// <summary>
/// 驗證 token 並回傳 account key
/// </summary>
[HttpGet("uofx/google-callback")]
public IActionResult Accountkey()
{
    ...

    // 根據 sid 取得帳號
    var accountKey = GetAccountBySid(sid);

    // 產生要回傳的 model
    var result = new CallbackResponseModel()
    {
        AccountKey = accountKey,
        Timestamp = DateTimeOffset.UtcNow.ToUnixTimeSeconds() //務必放當下時間,會依此時間來判斷是否過期
    };

    // 使用 AES 加密 model
    /*
        加密演算法:AES(Advanced Encryption Standard)
        填充模式:PKCS7
        加密模式:CBC(Cipher Block Chaining)
        反饋大小:128 位元
    */
    byte[] aeskeyBytes = HashHelper.SHA256ToBytes(_HashKey);
    var aesKey = aeskeyBytes;   // SecretKey 的 SHA256 Hash
    var aesIv = aeskeyBytes.Skip(16).ToArray(); // SecretKey 的 SHA256 Hash 後 16 bytes
    var encodeResult = AesHelper.EncodeData(JsonSerializer.Serialize(result), aesKey, aesIv);
    // 將加密後的結果傳回
    return Ok(encodeResult);
}
成果展示
最後,UOFX 會將加密後的 Google 帳號進行解密並比對帳號中的資訊,若正確則成功登入 UOFX